Maintained by Steve Eckert. See also the companion Crampon Strap page.
Steve Eckert's opinions, see also Wilson
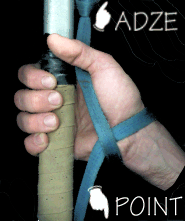
| It may not be clear without the text below, but here's a closeup
picture to illustrate the strap when your hand is "in it" properly:
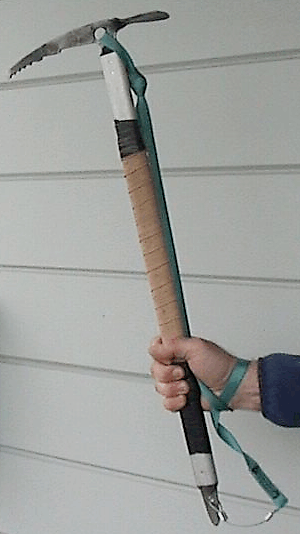
There is a strap tied to the head and the point of your axe, thru the holes most axes have in those places. If your axe doesn't have a hole in the point (the end AWAY from the head, not the pick!) this won't work. The strap is about 50% longer than the shaft, so it hangs loosely and you can stick your arm (or leg) into the loop when you need to "tie off" or rest briefly. In the picture below you can see that this time I got fancy: I got some thin steel cable and crimp connectors from the local hardware store, and replaced the lower portion of the webbing with a cable to protect against fraying. In California, we tend to use axes in scree almost as much as we do on ice, which makes REAL ice climbers recoil in disgust about how dull the point gets.
| 
|
To use the strap as a wrist loop (tether):
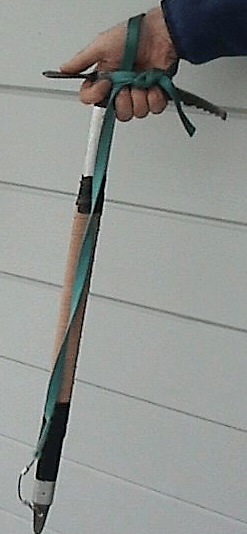
If any of this made sense, the strap will now come from the head of the axe (between the pick and the adze), down between your palm and the shaft, up around the back side of your wrist, between the bottom edge of your palm and the top strap, and then down to the bottom point of the axe. Look at the pictures again!
| 
|
| Here's a picture of my hand moved to the top of the axe, as you
would grip it when using it for balance or with the cross-body technique.
Note that you do NOT have to remove the strap to move from being locked
up at some point on the shaft to gripping the head. Just twist your arm
so the loop around your wrist loosens a bit, and let the loop slide
as you move.
As Aaron mentioned, it's very fast to change hands because all you do is reverse the circle with your hand and you're out of the loop. You won't lose your axe unless you do that half circle (intentionally, or while tumbling). To change your hand position along the shaft, release your grip and move your hand away from the shaft until the figure-8 opens up a bit. You can then move up or down (with the strap sliding around your wrist), and when you're in position simply grab the shaft again. It's always amazing how the strap locks up and holds your wrist in place with almost no effort. You don't have to think about re-positioning the way you do with adjusting buckles, and there is nothing to fail (unless the strap is cut).
| 
|
Hal asked if changing mittens/gloves makes a difference in the strap length - well, it does, but not much! I size it for my thickest mittens, then with thin gloves I sometimes wrap a loop of webbing around the base of the adze to shorten the strap a bit. The tension is above your wrist, and below your wrist just hangs loose, so a little extra slack doesn't matter much. The REAL problem is making sure you have ENOUGH slack to allow your hand to move to the top of the head for self-arrest and balance/picket use WITHOUT removing your hand from the loop. If you can't do that, make the strap longer.
Using a slider ring on the shaft of the axe with a short webbing loop around your wrist achieves a similar result, but I've found the rings don't lock up as positively on bare metal shafts and they tear up the padding on insulated shafts. For general mountaineering, I use (believe it or not) bicycle handlebar cork tape to improve my grip and insulate my hands from the cold shaft. Trap the ends of the cork tape with electrical tape and you've got a bomber system that doesn't cost much and is easy to repair.
Christopher pointed out that if you slip and hang from your wrist, having the strap attached to the middle of the shaft (a slider) or at both ends (my system) makes it is much less likely to lever the shaft out of the snow. Very true! Most tethers (waist or wrist) are attached only at the head, and you can't trust that unless the axe is completely driven in (not very likely). Pull on the tether, and the axe tilts downhill and pulls out. With the slider or the system I use, you can actually push the head away from you while driving in the point and achieve something like a picket placement "on the fly". Proof is left to the student, but in soft corn this is often the ONLY way to stop (since a standard self arrest just uses the pick, and its small cross-section doesn't provide enough drag in the granular soft snow). Trying to hold onto the shaft without a strap is grasping at straws.

This information is for ice AXE use NOT ice TOOLs used for technical ice climbing. The two techniques are completely different and do not even use the same hardware. Technical ice climbers always use wrist loops so they can hang on their tools on vertical ice. Ice tools are much shorter and are NOT called ice axes. Ice tools can be used in place of ice axes by expert climbers in desperate situations.
With My axe rigging please note the following:
The Head:
The pick shape is controversial.
Read "Mountaineering, Freedom of the Hills" (p282 6th ed) for more
input. Basically, positive clearance is what ice climbers use and it does not
seem to cause any problem for other techniques applicable to snow/glacier
use. File or grind (keeping the tool cool to the touch) to achieve the shape.
A very sharp axe with positive clearance can do the job in a pinch on water
ice which you did not expect on your selected route. I have even shortened
the tether so the axe seemed shorter to get up a patch of blue water ice. I
shortened the tether by wrapping it around the head.
|
The Tether:
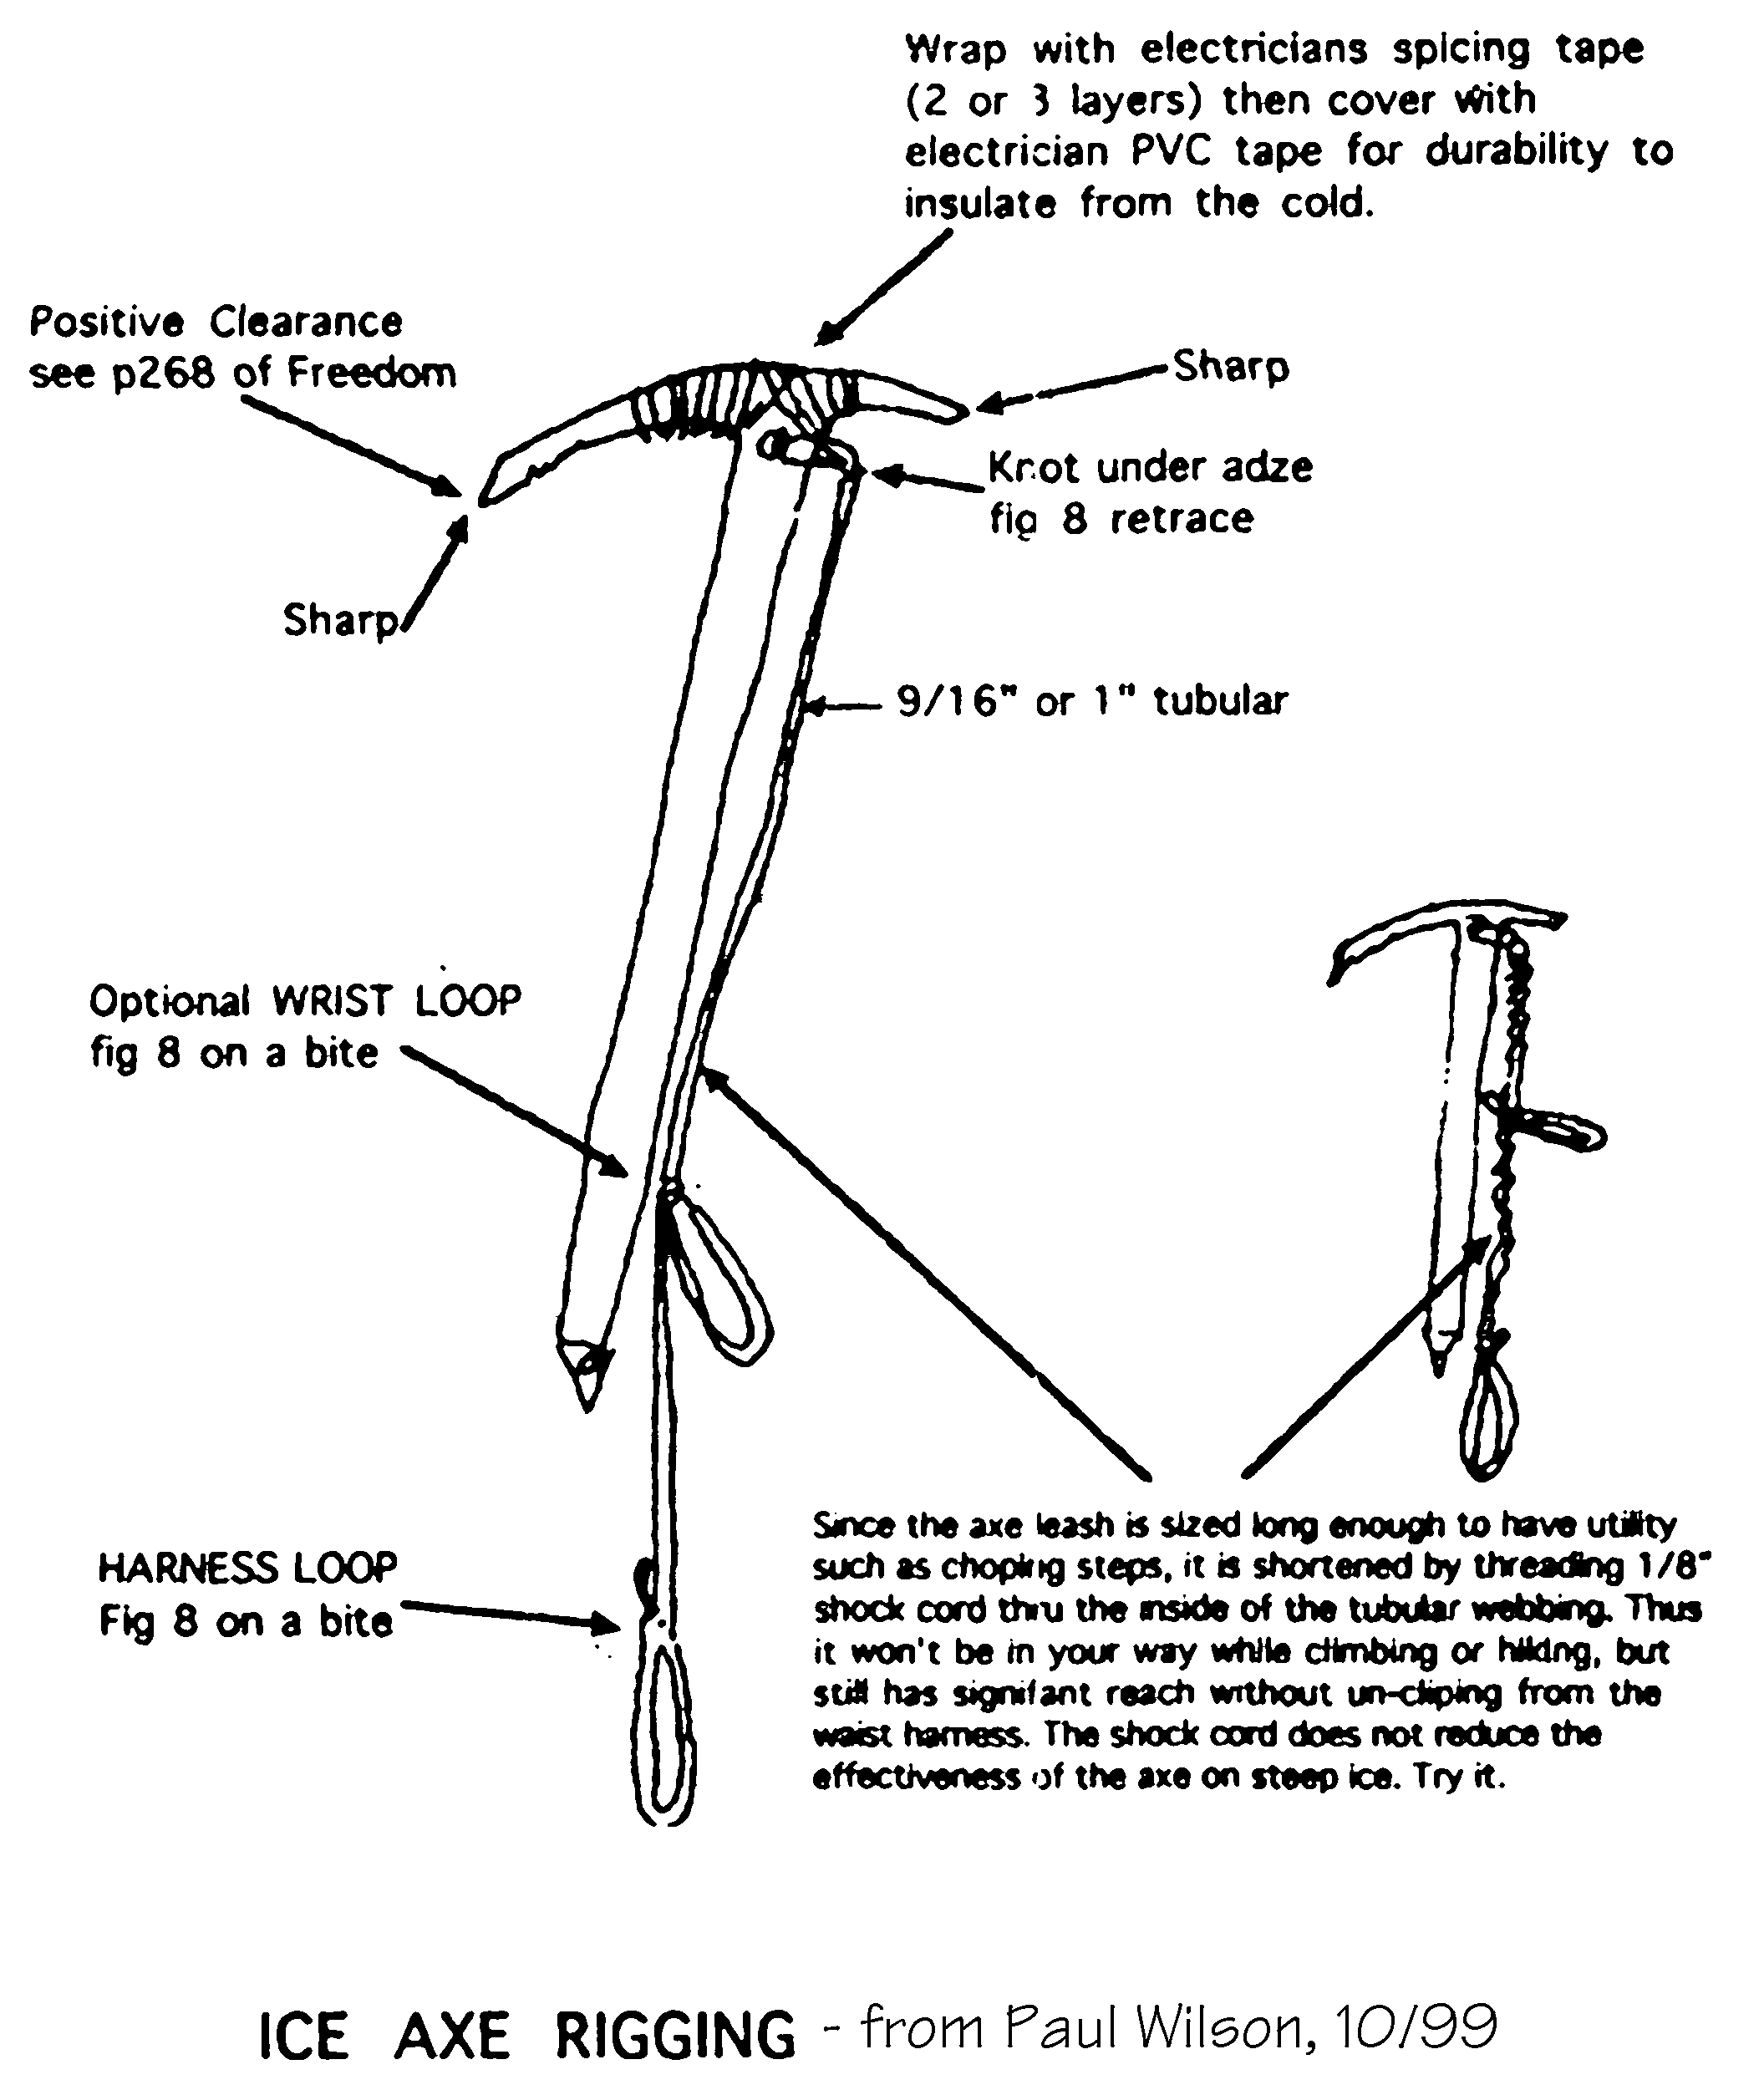
I rig the tether with the wrist loop big enough for the mittened hand and for grip at the spike end. The waist loop is the same size but could be smaller as it is seldom used for the mittened hand. The waist loop is placed so that one can cut steps at full reach below, and long enough to secure a placement as high as one can reach. This is a trial and error process.
Adding the shock cord:
|
Here's a picture, a sketch is also above:
|
Before tying the shock cord at the head, stretch it so it droops just above the knee to eliminate the problem of catching as you climb up the snow field. When you use the system a few times you can untie the waist end and tighten it up to compensate for the shock cord stretch. Since you did not tie it at the wrist strap, the tether will be uniformly compressed.
Hint:
With tight weave webbing it is harder to make the hole but does
not fray as the loose weave webbing does thus it lasts longer and looks
better. Smaller than 1/8" shock cord is worth a try if it still
stretches/shrinks when cold. I use 9/16" tubular webbing.
Other:
I like the idea of cork bicycle tape for better insulation (but higher
cost than electrical tape) on the head covered with the cold use electrical
tape to provide resistance to wear. This padding is to prevent cold hands or
at worst frostbite. But be aware with desperate use of the pick the padding
gets trashed.
Use:
Limitations:
Comment:
There lots of ways to deal with an ice axe tether. You may see world
class climbers NOT using tethers, but just remember:
More:
If you need an ice axe you should think about wearing a climbing helmet.
Hard snow cannot be avoided (specially if you fall) and the extra protection
is nice and may save you from a bad head injury. Ice axes and helmets always
go with snow and ice.