| Table of Contents (see also Figures and Tables) |
| - | FORWARD, CREDITS, REVISION NOTES | Page 2 |
| - | TABLE OF CONTENTS (click on lines to jump inside PDF file) | Page 4 |
| - | LIST OF FIGURES (click on lines to jump inside PDF file) | Page 7 |
| - | LIST OF TABLES (click on lines to jump inside PDF file) | Page 8 |
| 1 | PREFACE TO THE THIRD EDITION | Page 9 |
| 2 | INTRODUCTION | Page 9 |
| 2.1.1.1 | Anecdote: Which is Harder Everest or McKinley? | Page 11 |
| 2.2 | Weather | Page 11 |
| 2.2.1 | Weather Zones | Page 12 |
| 2.2.2 | Weather cycles | Page 12 |
| 2.3 | McKinley Weather Forecast | Page 13 |
| 2.4 | Suggested climbing strategy | Page 17 |
| 2.4.1 | "Sneaking up" on Big Mountains like McKINLEY | Page 17 |
| 2.4.2 | Potential summit schedule from 14k | Page 18 |
| 2.4.2.1 | Anecdote: The Wind. The wind | Page 20 |
| 2.4.2.2 | Anecdote: Snuggling with Amy. | Page 20 |
| 2.5 | Are you ready for Big Mac? | Page 20 |
| 2.6 | Attitude and Success | Page 21 |
| 2.7 | Picking Your Partner(s) | Page 22 |
| 2.8 | When to go and how long to budget | Page 23 |
| 2.8.1.1 | Anecdote: Crevasses and throwing the "Poo bag". | Page 23 |
| 3 | EQUIPMENT: | Page 25 |
| 3.1 | Tents: | Page 25 |
| 3.1.1 | Thoughts on Pitching your Tent | Page 26 |
| 3.1.1.1 | Anecdote: McKinley isn't a three-season mountain: | Page 27 |
| 3.2 | Personal Equipment (Hardware & Such) | Page 28 |
| 3.3 | Personal Equipment List | Page 30 |
| 3.3.1 | A word on Books and other Diversions: | Page 32 |
| 3.3.2 | Photography: | Page 32 |
| 3.3.2.1 | Film Photography: | Page 33 |
| 3.3.2.2 | Digital Photography | Page 34 |
| 3.3.3 | Sleeping Bags | Page 35 |
| 3.3.3.1 | Anecdote: Warming from the inside out | Page 37 |
| 3.3.4 | Sleeping Pads | Page 38 |
| 3.3.5 | Drag Bags vs. Sleds | Page 38 |
| 3.3.6 | Hydration systems: | Page 40 |
| 3.3.6.1 | Purifying Drinking Water | Page 40 |
| 3.3.7 | What is a PEE BOTTLE and why do you want one? | Page 40 |
| 3.3.8 | Vapor Barrier Socks. | Page 40 |
| 3.3.9 | Skis vs. snow shoes. | Page 41 |
| 3.3.10 | Choosing a backpack. | Page 42 |
| 4 | GROUP EQUIPMENT | Page 44 |
| 4.1 | Group Equipment List | Page 44 |
| 4.2 | Radios, Cell Phones and Family Service Radios (FSRs): | Page 45 |
| 4.2.1 | CB radio: | Page 45 |
| 4.2.2 | FSR (Family Service Radios "Talk Abouts") | Page 46 |
| 4.2.3 | Cell Phone: | Page 46 |
| 4.2.4 | 2m Single Side Band Radio. | Page 47 |
| 4.2.5 | Satellite phones | Page 47 |
| 4.2.6 | Renting a Satellite Phone | Page 47 |
| 4.3 | Emergency Locator Beacon | Page 49 |
| 4.4 | Stove: | Page 49 |
| 4.4.1 | Problems with Gas Stoves | Page 49 |
| 4.5 | First Aid kit and Medical training: | Page 50 |
| 4.6 | A Discussion on Weight | Page 51 |
| 4.7 | What I don't think is very useful | Page 56 |
| 5 | CLOTHING: | Page 57 |
| 5.1.1.1 | Anecdote: Remembering your grade school mittens | Page 57 |
| 5.2 | Clothing List | Page 59 |
| 5.2.1 | What I wore lower on the mountain. | Page 61 |
| 5.2.2 | Down Jackets and Parkas | Page 61 |
| 5.2.3 | Down Pants | Page 63 |
| 5.2.4 | Boots and socks | Page 64 |
| 5.2.4.1 | Some thoughts on Vapor Barrier Socks | Page 66 |
| 6 | FOOD AND COOKING | Page 68 |
| 6.1 | Cooking Equipment List | Page 71 |
| 6.1.1 | A Discussion About Super Efficient Cooking Systems | Page 72 |
| 6.1.2 | Clean-up Tips: | Page 72 |
| 6.1.3 | Wind screens and the Science of Boiling Water | Page 72 |
| 6.2 | Menus and Food | Page 73 |
| 6.2.1 | Food considerations: | Page 73 |
| 6.2.2 | Some food suggestions: | Page 75 |
| 6.2.2.1 | Anecdote: "Kudo" Bars to the Max | Page 76 |
| 7 | NAVIGATION | Page 77 |
| 7.1 | GPS use on McKinley | Page 77 |
| 7.1.1.1 | Anecdote: Humans as Blankets | Page 77 |
| 7.2 | Several Navigation Tips: | Page 78 |
| 8 | HYGIENE | Page 81 |
| 8.1 | Hygiene Items and Considerations | Page 81 |
| 8.2 | General Hygiene and Toilet Practices: | Page 82 |
| 8.3 | Human Waste Disposal | Page 83 |
| 8.4 | To shave or not to shave: | Page 84 |
| 8.4.1.1 | Antidote: What kind of Harness do you want? | Page 85 |
| 9 | SKILLS YOU'LL NEED | Page 87 |
| 9.1.1.1 | Anecdotes on Crevasse Rescue and Safety: | Page 87 |
| 10 | PACKING FOR THE AIRLINES AND OTHER AIR TRAVEL CONSIDERATIONS | Page 89 |
| 10.1 | Gas, Fuel Canisters, and Other "Terrorist" Items | Page 89 |
| 10.2 | Airline Reservation flexibility | Page 89 |
| 10.3 | Packing for the Flight | Page 90 |
| 11 | A SUGGESTED READING LIST: | Page 91 |
| 12 | DENALI WILL KILL YOU (DISCLAIMER) | Page 92 |
| 13 | COMPARISON OF CLIMBING SCHEDULES | Page 97 |
| 14 | OTHER SOURCES OF INFORMATION AND RELEVANT NEWS ITEMS ON CLIMBING DENALI | Page 103 |
| 14.1 | Relevant News in 2008 typical of the climbing season on McKinley | Page 103 |
| 14.2 | Park Service Web Site and information | Page 104 |
| 14.3 | Current Weather on Denali | Page 104 |
| List of Figures (see also Contents and Tables) |
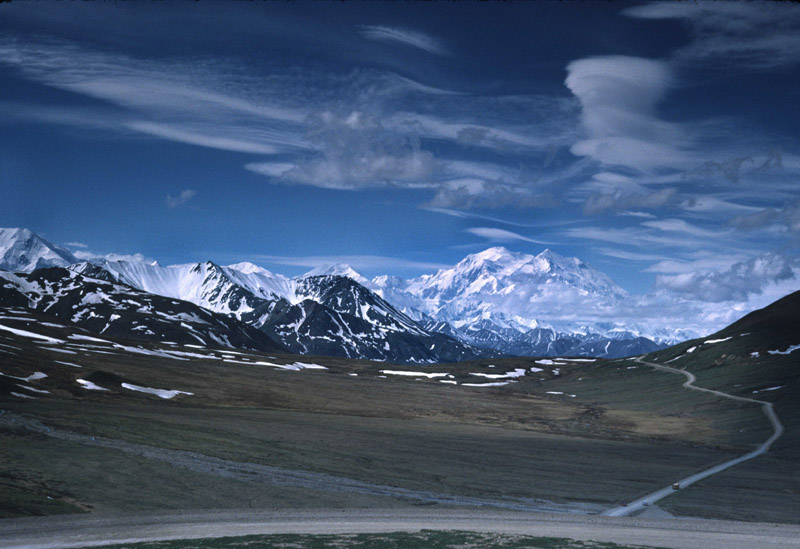
| Cover Photo | Mt McKinley from the Denali Park Road | Page 1 |
| Figure 1 | Around Windy (Icy!) Corner (13,000 ft.) Note storm clouds below | Page 15 |
| Figure 2 | Snowshoeing through a snowstorm at 10,000 feet | Page 16 |
| Figure 3 | The successful 2005 "3-D" Team on top of McKinley 20,320 ft | Page 19 |
| Figure 4 | Throwing the "Poo bag" at 11k into a monster Crevasse | Page 24 |
| Figure 5 | Snow Wall surround tents at 14,000 ft, poor weather Clouds and Mt Hunter in the background | Page 26 |
| Figure 6 | Proper Tent Pitching in a McKinley Snow Hole | Page 27 |
| Figure 7 | Our Group's Climbing Equipment Stash at 14,000 ft | Page 28 |
| Figure 8 | Tim Hult Skiing up the Kahiltna 9,500 ft | Page 29 |
| Figure 9 | Joe Burton Working Cross word puzzles at 17,200 ft | Page 32 |
| Figure 10 | Joe Burton in his Big, -40 F/C Down Sleeping Bag | Page 37 |
| Figure 11 | Scott Warner Hefts his Monster Load at 8,000 feet | Page 43 |
| Figure 12 | Scott Warner Starts out with way too much weight 2005 | Page 52 |
| Figure 13 | Scott Warner Practicing crevasse self-rescue on a training trip | Page 53 |
| Figure 14 | Mount Hunter from 8,000 ft Camp | Page 54 |
| Figure 15 | Skiing up the Lower Kahiltna in a Low Clouds and Fog | Page 55 |
| Figure 16 | The Rescue Helicopter Evacuates a climber from 14,000 ft | Page 58 |
| Figure 17 | Tim's Summit Kit | Page 64 |
| Figure 18 | Going Down from 14,000 to pick up a Cache. Mt Foraker in background | Page 67 |
| Figure 19 | Climbers moving up from Windy Corner at Dusk, Mt Hunter in background | Page 67 |
| Figure 20 | Joe Burton Prepares a Meal at 11,000 ft | Page 69 |
| Figure 21 | Day One Getting Ready to Pulling The Full Load Out of 7,000 ft | Page 69 |
| Figure 22 | Typical unbalanced sled position | Page 70 |
| Figure 23 | Freezing Fog on the Lower Kahiltna Glacier | Page 79 |
| Figure 24 | Moving Up The West Buttress in Foggy Weather (15k 16,000 ft) | Page 80 |
| Figure 25 | Joe Burton Disposing the of the "Poo Bag" in a BIG Crevasse at 11,000 ft | Page 83 |
| Figure 26 | The High Altitude Poo Bucket and Other Gear at 17k | Page 84 |
| Figure 27 | Taking a sponge "bath" at 11,000 ft | Page 86 |
| Figure 28 | Alaska Range Memorial Board | Page 92 |
| Figure 29 | Denali from 8,000 ft, NE Fork of the Kahiltna (foreground), West Rib (middle), and Denali's 20, 320 ft Summit | Page 93 |
| Figure 30 | Clouds "spill" over Kahiltna Pass at 11 PM - 12,000 ft | Page 94 |
| Figure 31 | 11,000 ft Camp | Page 95 |
| Figure 32 | The "ants" Marching up the West Buttress from 14,000 ft to 16,000 ft. on a good weather day | Page 96 |